Welcome to the zipper pouch tutorial! This guide will walk you through creating a functional and stylish pouch, perfect for beginners. Learn essential sewing skills and make a practical accessory to organize your belongings with ease.
1.1 What is a Zipper Pouch?
A zipper pouch is a versatile, sealed bag with a zipper closure, ideal for storing small items like makeup, electronics, or personal accessories. It’s a practical DIY project that combines functionality with style. Perfect for beginners, zipper pouches are customizable in size, fabric, and design, making them a great way to enhance your sewing skills and create personalized gifts.
1.2 Benefits of Making a Zipper Pouch
Making a zipper pouch is a great DIY project that offers numerous benefits. It helps develop essential sewing skills, such as working with zippers and fabric alignment. Additionally, it allows for customization, enabling you to create a personalized accessory that suits your style. This project is also eco-friendly, as it encourages reusing fabric scraps, and makes for a thoughtful, handmade gift.
1.3 Who Can Benefit from This Tutorial?
This tutorial is ideal for beginners looking to enhance their sewing skills, as it covers fundamental techniques like zipper installation. DIY enthusiasts and crafters will appreciate the customizable nature of the project. It’s also perfect for anyone seeking to create practical, eco-friendly accessories or unique gifts; The step-by-step guide ensures success for sewists of all skill levels.
Materials and Tools Needed
To create a zipper pouch, you’ll need fabric, a zipper, sewing machine, scissors, pins, a ruler, iron, and seam ripper. These essentials ensure a smooth sewing process.
2.1 Fabric Requirements
For a zipper pouch, choose durable fabrics like cotton, polyester, or canvas. Use 1/2 to 1 yard of fabric, depending on pouch size. Pre-wash and dry fabric before cutting. Consider using contrasting fabric for lining or accents to enhance the design. Ensure fabric is smooth and evenly textured for a professional finish;
2.2 Zipper Selection Guide
Choose a zipper that matches your pouch size and style. Opt for a coil or tooth zipper, depending on durability needs. Select a length slightly longer than the pouch width for easy closure. Consider a separating zipper for stand-up pouches. Ensure the zipper’s color complements the fabric. A smooth-gliding zipper ensures a professional finish and ease of use.
2.3 Essential Sewing Tools
To create a zipper pouch, you’ll need a few basic sewing tools. Start with a sewing machine and sharp fabric scissors or a rotary cutter for precise cuts. A ruler or tape measure ensures accurate fabric measurements. Pins and a seam ripper are handy for adjusting mistakes. Use coordinating thread and a sewing needle for hand-stitching. An iron and ironing board are crucial for crisp seams. Optional tools include a sewing gauge for straight lines and a zipper foot for your machine to handle zippers smoothly. Having these tools ready ensures a professional and polished finish for your pouch.

Understanding Zipper Types
Zipper pouches rely on the right zipper type for functionality. Common options include coil zippers for flexibility, YKK zippers for durability, and open-end zippers for easy installation. Choose based on your pouch’s intended use and design.
3.1 Types of Zippers for Pouches
Common zipper types for pouches include coil zippers, known for flexibility, and YKK zippers, praised for durability. Open-end zippers are ideal for easy installation, while closed-end zippers offer a secure finish. Additionally, zipper pullers can enhance functionality. Each type suits different pouch designs, ensuring the perfect fit for your project’s needs.
3.2 How to Choose the Right Zipper
Choosing the right zipper involves considering the pouch size, zipper length, and type. Opt for a zipper that matches your fabric weight and desired durability. Coil zippers are flexible, while YKK zippers are sturdy. Measure twice to ensure the zipper fits your pouch design. A well-chosen zipper enhances both functionality and aesthetics, making your pouch more professional and user-friendly.
3.3 Zipper Care and Maintenance
Proper zipper care ensures longevity. Avoid exposing zippers to harsh chemicals or extreme heat. Store pouches in a cool, dry place to prevent rust or damage. Regularly clean zippers with a soft cloth to remove dirt. Lubricate occasionally for smooth operation, especially for metal zippers. Handle the zipper gently to avoid breakage.
Avoid forcing the zipper open or closed, as this can cause teeth misalignment. For stuck zippers, gently wiggle the puller while applying light lubricant. Regular maintenance keeps your zipper pouch functional and looking its best, ensuring years of reliable use and a professional finish.

Step-by-Step Sewing Guide
Start by cutting your fabric and zipper to size. Attach the zipper to the fabric edges, ensuring alignment. Sew the sides and bottom seams securely. Turn the pouch right side out through the zipper opening for a polished finish.
4.1 Cutting Fabric for the Pouch
Begin by measuring and cutting two main fabric pieces to your desired pouch size. Ensure the fabric is squared and aligned properly. Use scissors or a rotary cutter for precise cuts. If using a lining, cut an additional piece to match. Trim excess fabric carefully to avoid fraying. This step sets the foundation for a professional-looking pouch.
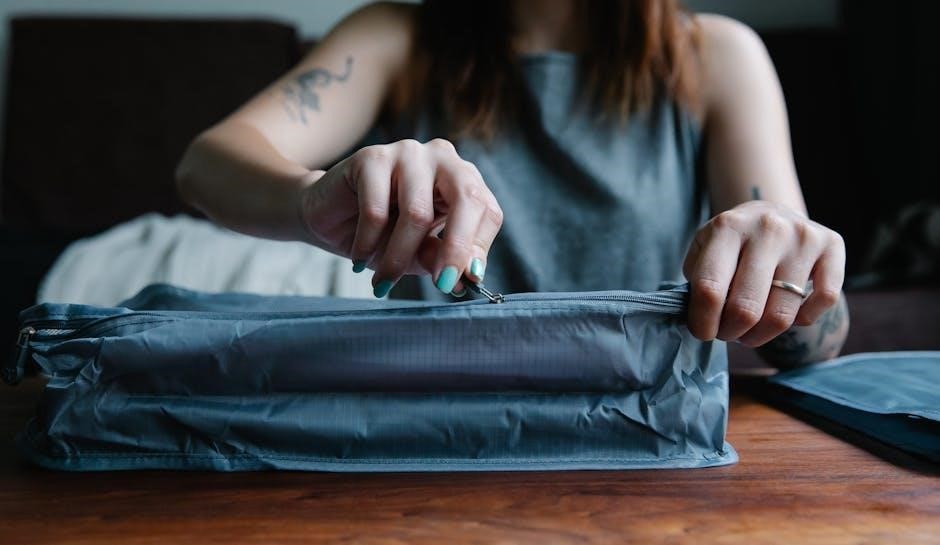
4.2 Attaching the Zipper
Align the zipper with the fabric edges, ensuring it’s centered. Pin the zipper in place, then sew along the edges using a zipper foot. Keep the zipper halfway open to facilitate turning. Backstitch at the start and end for durability. Press the seams for a crisp finish. Ensure the zipper pull is accessible and properly aligned.
4.3 Sewing the Sides and Bottom
Place the pouch with the wrong sides together, ensuring the zipper is closed to avoid catching it. Pin the sides and bottom edges, then sew with a ¼-inch seam allowance. Backstitch at the beginning and end for strength. Press the seams flat to create a crisp fold. This step shapes the pouch and secures the fabric in place.
4.4 Turning the Pouch Right Side Out
Carefully turn the pouch right side out through the open zipper. Use a blunt tool like a chopstick to push out the corners for sharp angles. Gently tug the fabric to ensure the seams lie flat. Press the seams with an iron to create a crisp, professional finish. The pouch is now ready for final touches.
Tips for a Professional Finish
Press seams and creases for a polished look. Topstitch edges to highlight details and ensure fabric alignment for a clean, professional finish.
5.1 Pressing for a Crisp Look
Pressing is key to achieving a professional finish. Use a hot iron with steam to flatten seams and creases. Press each seam as you sew and again after completing the pouch. For sharp corners, use a tailor’s ham or seam roll. This ensures a crisp, polished appearance and prevents bulky folds.
5.2 Topstitching for a Polished Appearance
Topstitching adds a professional touch to your zipper pouch. Sew parallel lines along the edges or seams using contrasting thread for visual appeal. Maintain consistent stitch length and backstitch at the beginning and end for a clean finish. This technique enhances durability and creates a polished, high-quality look for your handmade pouch.
5.3 Handling Fabric Alignment
Proper fabric alignment ensures a professional finish. Pin edges carefully, matching patterns and grain lines to avoid distortion. Use a rotary cutter or scissors for precise cuts. Press fabric before sewing to remove wrinkles, ensuring accurate alignment. This attention to detail guarantees a polished, symmetrical pouch that looks handmade with care and precision.

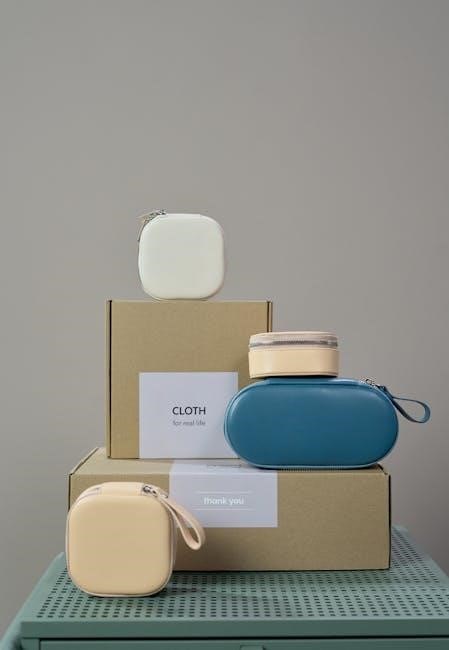
Variations and Customization
Customize your zipper pouch with pockets, compartments, or tabs for functionality. Use contrasting thread colors and choose fabric patterns for a unique, personalized design easily.
6.1 Lined vs. Unlined Pouches
A lined pouch offers a polished finish, hiding seams and adding durability, while an unlined pouch is quicker to make with less fabric. Choose lined for a professional look or unlined for simplicity, depending on your project goals and desired functionality. Both options provide great results for customizing your zipper pouch design.
6.2 Adding Tabs or Pullers
Enhance your zipper pouch’s functionality and style by adding tabs or pullers. Use fabric scraps, ribbon, or metal rings for a decorative touch. Attach them securely to the zipper before sewing the pouch, ensuring they don’t interfere with the zipper’s movement. This small detail can make a big difference in both appearance and usability, providing an easy grip and a polished finish.
6.3 Boxed Bottoms for a Stand-Up Pouch
Create a stand-up pouch by adding boxed bottoms, which provide a flat base for stability. Cut the fabric slightly larger at the bottom, then sew and fold the corners to form a square or rounded shape. This technique adds functionality and a professional finish, allowing the pouch to stand upright and hold its shape perfectly for storing small items like makeup or pens.
Troubleshooting Common Issues
Troubleshoot common problems like stuck zippers, uneven seams, or fabric misalignment. Use tools like seam rippers for corrections and ensure proper zipper lubrication for smooth operation.
7.1 Fixing a Stuck Zipper
A stuck zipper can be frustrating, but it’s often easy to fix. Use a graphite pencil or silicone spray to lubricate the zipper teeth. Gently tug the zipper back and forth to loosen it. If stuck due to fabric, carefully trim excess material. Regular cleaning and lubrication prevent future issues and ensure smooth operation.
7.2 Adjusting Zipper Length
To adjust zipper length, cut the zipper to desired size using scissors or a seam ripper. Attach a zipper stop or a new puller to secure the end. Ensure the zipper functions smoothly after adjustments. This method allows customization for various pouch sizes while maintaining functionality and durability.
7.3 Correcting Sewing Mistakes
If sewing mistakes occur, such as uneven seams or misaligned zippers, use a seam ripper to carefully remove stitches. Press the fabric to flatten it, then re-sew with adjusted alignment. For puckering or bunching, gently stretch the fabric while sewing. Patience and attention to detail are key to achieving a professional, error-free finish.

DIY Customization Ideas
Add personality to your zipper pouch with creative touches like appliques, embroidery, or contrasting thread. Experiment with fabric patterns, colors, and textures to make it uniquely yours.
8.1 Adding Pockets or Compartments
Enhance functionality by adding pockets or compartments to your zipper pouch. Use contrasting fabric for a pop of color or match the main material for a seamless look. Sew small pockets inside or outside for organization, perfect for storing tiny items like keys or chargers. This customization adds utility and personal style to your pouch.
8.2 Embellishing with Appliques
Add personality to your zipper pouch by embellishing with appliques. Use fabric scraps, pre-made shapes, or iron-on designs to create unique patterns. Apply them before sewing the pouch together for a seamless look. This technique allows for endless creativity, making your pouch truly one-of-a-kind. Perfect for adding a personal touch or themed designs.
8.3 Using Contrasting Thread Colors
Enhance your zipper pouch’s aesthetic appeal by using contrasting thread colors. This technique adds a decorative touch, making stitching visible and stylish. Choose threads that complement or boldly contrast with your fabric for a personalized look. Contrasting threads can highlight seams, zippers, or appliques, giving your pouch a unique and professional finish that stands out.
Congratulations! You’ve successfully created a custom zipper pouch. Pat yourself on the back for learning new sewing skills. Always inspect your pouch before use, store it neatly, and don’t hesitate to experiment with new designs and fabrics.
9.1 Final Inspection Before Use
Before using your zipper pouch, inspect it thoroughly. Check for loose threads, ensure all seams are secure, and verify that the zipper is functioning properly. Make sure the pouch is clean and free of debris. A final once-over ensures your handmade accessory is both durable and professional-looking.
9.2 Storing Your Finished Pouch
To maintain your zipper pouch’s quality, store it in a cool, dry place away from direct sunlight. Avoid folding or creasing to prevent damage. Keep it clean and dry, as moisture can harm fabrics. Store small items inside to maintain shape. Proper storage ensures your pouch remains durable and ready for use whenever needed.
9.3 Encouragement to Experiment
Now that you’ve mastered the basics, don’t hesitate to experiment with new fabrics, colors, and designs. Try adding pockets, appliques, or unique zippers to create one-of-a-kind pouches. Sewing is a journey, and experimenting with different techniques will enhance your skills and inspire creativity. Embrace mistakes as learning opportunities and enjoy the process of making something truly personalized.
Additional Resources
Explore free patterns, tutorials, and sewing communities online for more inspiration. Websites like Pinterest, YouTube, and sewing blogs offer a wealth of ideas and guides to enhance your zipper pouch projects.
10.1 Recommended Patterns and Tutorials
Discover recommended patterns and tutorials for zipper pouches online. Websites like Pinterest, YouTube, and sewing blogs offer a variety of free guides, from simple to advanced designs. Explore lined pouches, stand-up styles, and customizable options to enhance your project. Popular resources include So Sew Easy, Melly Sews, and Craftsy for detailed step-by-step instructions and inspiration.

10.2 Where to Find Inspiration
Find inspiration for your zipper pouch projects on platforms like Pinterest, Instagram, and sewing blogs. Explore creative designs, unique fabrics, and styling ideas. Join sewing communities and forums to discover trends and share ideas. Visit craft fairs or online marketplaces like Etsy for handmade examples. Let your personal style and needs guide your design choices for a truly custom pouch.
10.3 Joining Sewing Communities
Engage with online sewing communities like Facebook groups, Reddit forums, or local sewing meetups. Share your creations, ask questions, and gain feedback from experienced sewists. These platforms foster creativity, provide support, and keep you updated on the latest trends. Joining communities helps you stay motivated and connected with fellow enthusiasts who share your passion for sewing.